Mastering CS2 Anubis guide callouts and smokes is essential for climbing the competitive ladder in 2026. Anubis is one of the most unique maps in Counter-Strike 2, featuring ancient Egyptian architecture, water-filled mid areas, and complex verticality that demands precise communication and utility usage. I’ve spent hundreds of hours on this map, and the difference between players who know their callouts and utility versus those who don’t is night and day.
This CS2 Anubis guide combines everything you need: complete callout references for every position, essential smoke lineups for both T and CT sides, and the practice commands to master them offline. Whether you’re grinding Faceit, Premier, or competitive matchmaking, these utility setups and callouts will give your team the communication edge needed to win more rounds.
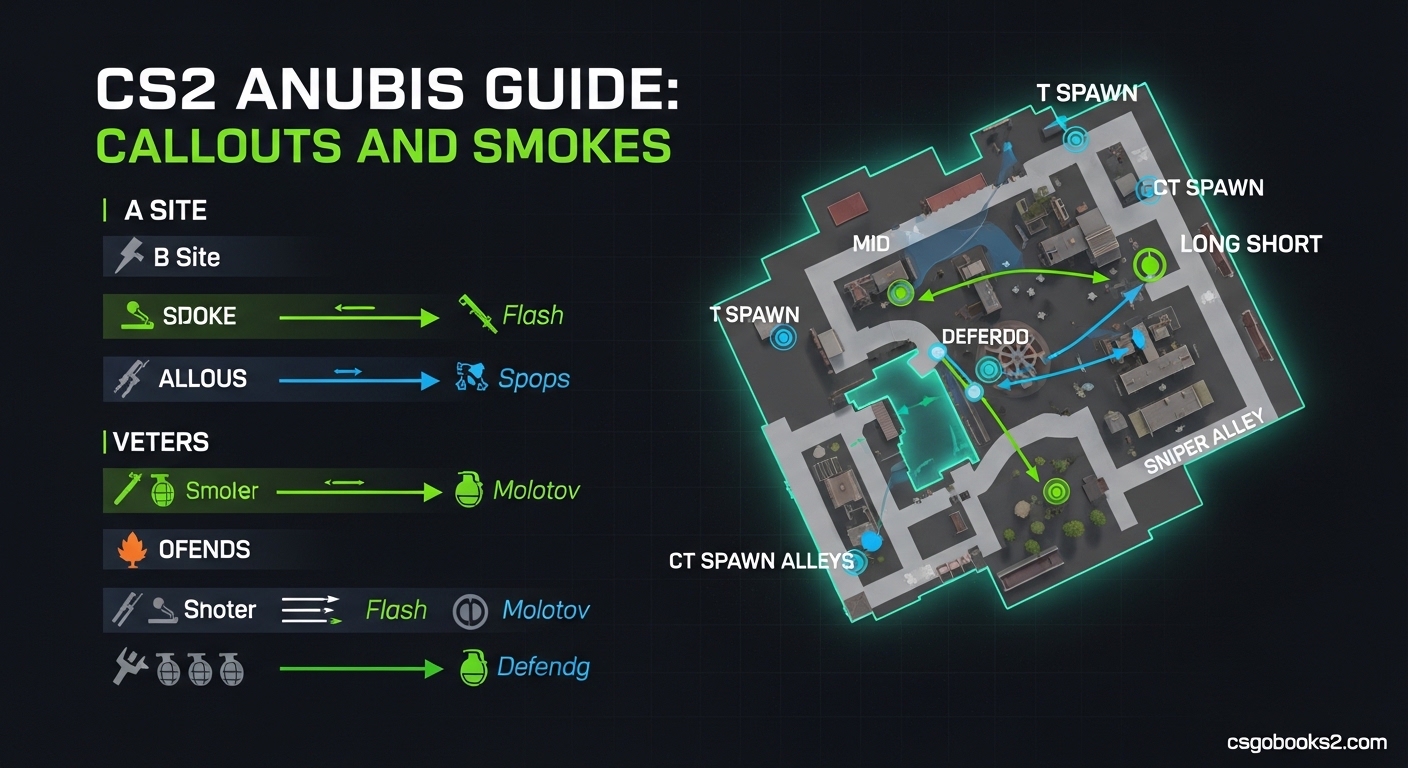
What Makes Anubis Unique in CS2?
Anubis stands apart from other competitive maps with its distinctive ancient Egyptian theme and water mechanics. The map features two bomb sites connected by a central mid area with water and a stone bridge. What makes Anubis particularly challenging is the variety of sightlines and elevation changes—positions like heaven on A site or palace on B site dominate angles below them.
The water in mid is not just cosmetic. It affects movement speed and sound, making footstep positioning crucial. Additionally, Anubis has undergone several updates since its introduction, with new holes and sightlines added that changed utility lineups significantly. This guide reflects the current 2026 state of the map with all updated positions.
Communication and utility are the backbone of successful Anubis gameplay. Without proper callouts, your team won’t know where enemies are pushing. Without smokes, you’ll get picked by AWPers holding long angles. This guide solves both problems.
Complete Anubis Callouts Reference (July 2026)
Clear callouts are the foundation of team communication in CS2. When you call an enemy position, your teammates need to know exactly where you mean instantly. I’ve standardized these callouts based on competitive play across NA and EU servers, minimizing confusion between regional variations.
A Site Callouts
A Site is the more open of the two bomb sites on Anubis, with several elevated positions that defenders can use to gain vertical advantage. Here are all the essential callouts:
Heaven: The elevated position overlooking A site from the CT spawn side. This is a dominant AWP angle that can see almost the entire site. When an AWPer is holding heaven, executing onto A becomes extremely difficult without utility.
Water/Front: The water-filled area directly in front of the A site plant zone. Players can hide in the water or behind the front stone structures. This is a common position for terrorists to hide after planting.
Plant Zone/Default: The primary bomb planting location on A site, marked by the horseshoe-shaped sand area. This is where you should default your plant unless specific positioning calls for elsewhere.
Pillars: The stone columns on the left side of A site (when entering from connector). These provide cover and are common positions for both CTs holding angles and Ts hiding after plant.
Short/Catwalk: The raised pathway leading from mid water area toward A site. CTs often hold this angle to catch terrorists pushing from mid.
Connector: The passage connecting A site to the mid area. This is a critical choke point that both teams fight over for map control.
Palace (A side): The building area on the far side of A site that connects toward B long. Players can hold angles from palace windows and doorways.
B Site Callouts
B Site is more enclosed than A, with tighter corridors and more close-quarters combat potential. The callouts here are equally important for site executes and retakes:
Plant Zone: The primary planting location on B site, located in the center of the area near the stone structures. This is the default plant position unless you’re doing a specific plant for a post-plant setup.
Long: The long, narrow passage leading from T spawn toward B site. This is a common avenue for terrorists to approach B, and CTs often hold long with rifles or AWPs.
B-Gate: The gated area at the end of B long that opens into B site. This is a choke point where utility is often deployed to enable safe entry.
Palace (B side): The elevated area overlooking B site from the CT spawn side. Similar to heaven on A, this provides a dominant vantage point for defenders.
Cave: The dark, enclosed area connecting CT spawn to B site. CTs often use cave to rotate to B or hold unexpected angles.
Backsite: The area behind the B site plant zone, toward the palace and cave directions. This is where CTs often retreat to or hold during retake situations.
Tunnel: The underground passage connecting B site to the mid area. This provides an alternative route for rotations and can be used for flanking maneuvers.
Boat: The decorative boat structure on B site that provides cover. Players often hide behind or on top of boat during post-plant situations.
Stairs: The staircase area on B site leading toward palace. This area sees frequent close-quarters combat during site executes and retakes.
Mid and Connector Callouts
Control of mid is crucial on Anubis, as it connects to both bomb sites and enables rotations. These callouts are vital for coordinating mid control and map presence:
Mid Water: The water-filled central area of mid. Players can move through water (slower) or use the bridge. Footstep sounds in water are distinctive, making audio cues important.
Bridge: The stone bridge crossing over the mid water area. This provides elevated position and faster movement compared to going through water.
E-Box (Electric Box): The small structure with electrical equipment near mid, on the connector side. This is a common position for CTs to hold mid control and a popular smoke target.
Arches: The arched structure area on the T side of mid. This is another important mid control position and smoke target.
Connector: The main passage connecting mid to A site. Control of connector allows CTs to support both A site and mid, while terrorists use it for A executes.
Top Mid: The elevated area on the T side leading down to mid water. Terrorists often use top mid for mid control strategies.
T Spawn: The terrorist spawn area, which connects to both B long and top mid approaches.
CT Spawn: The counter-terrorist spawn area, with quick access to both A heaven and B cave/palace.
Essential T-Side Smoke Lineups
Terrorist-side smokes on Anubis are your ticket to successful bomb site executes. Without proper smoke coverage, your team will get picked off by defenders holding dominant angles. I’ve tested these lineups extensively in 2026, and they consistently work when executed properly.
Mid Control Smokes
Controlling mid is often the first step toward a successful round on Anubis. Mid control enables your team to gather information, apply pressure to both sites, and choose your execute timing. These smokes are essential for establishing mid presence:
E-Box Smoke from Top Mid: Position yourself at top mid near the edge. Aim at the corner of the building structure above E-Box, slightly left of the protruding edge. Use a left-click throw with no movement. This smoke blocks CT vision from E-Box, a common mid-holding position.
Arches Smoke from Top Mid: From the same top mid position, aim at the top right corner of the skybox near the arched structure. Use a standard left-click throw. This smoke cuts off vision from arches area, another common CT position.
Connector Smoke from Top Mid: Stand near the edge of top mid facing connector. Aim at the notch in the wall above the connector entrance, slightly to the right of center. Left-click throw. This smoke blocks CT vision from connector into mid, preventing them from contesting your mid control.
With all three smokes deployed, your team can safely take mid control and decide whether to execute A or B based on CT rotations. I recommend having one player dedicated to mid smokes each round, typically a support player.
A Site Smokes
Executing onto A site requires specific smoke coverage to neutralize the powerful CT positions. Heaven is particularly dangerous, and connector can catch your team off guard during the execute:
Heaven Smoke from T Spawn: Go to T spawn and position yourself against the wall near the barrier. Aim at the top of the palm tree on the left side of heaven, slightly to the right of the trunk peak. Use a jump-throw bind for consistency. This smoke blocks the dominant heaven angle, the most important CT position on A site.
Connector Smoke from A Main: Enter A main (the long passage leading to A site from CT spawn side). Position yourself near the boxes at the end of A main. Aim at the top edge of the building visible through the connector gap, slightly to the left of center. Left-click throw. This smoke prevents CTs in connector from seeing your team enter A site.
A Main Smoke from Short: If your team approaches A from short/mid, position yourself on short catwalk. Aim at the top of the doorway structure at the end of A main. Use a jump-throw for best results. This smoke blocks CT vision from A main, covering your entry into the site.
For a complete A execute, I recommend throwing heaven smoke first, then connector smoke, followed by A main smoke if needed. Flashbangs should be coordinated with smokes for maximum effect.
B Site Smokes
B site executes require different smoke coverage due to the enclosed nature of the area. Long is the primary avenue of approach, and CT positions in palace and backsite need to be neutralized:
Long Smoke from T Spawn: Position yourself in T spawn near the boxes. Aim at the top of the building structure visible down long, slightly to the right of center. Use a standard left-click throw. This smoke blocks CT vision from long, enabling your team to move down long safely.
Palace Smoke from Long: After moving down long, position yourself near the B-gate area. Aim at the top of the palace structure overlooking B site. Use a jump-throw for consistency. This smoke blocks CT vision from palace, a dominant elevated position on B.
B-Gate Smoke from Long: From the same long position, aim at the top of the gate structure itself. Left-click throw. This smoke blocks CT vision through the gate, covering your team’s entry onto B site.
Backsite Smoke from Long: Position yourself near B-gate after moving down long. Aim at the top edge of the wall visible in the distance, toward the backsite area. Use a jump-throw. This smoke blocks CT vision from backsite positions, preventing them from seeing your plant.
For a clean B execute, start with long smoke from T spawn, then move down long and throw palace smoke before entering the site. B-gate and backsite smokes can be used based on CT positions your team spots.
Instant Smoke Lineups from Spawn
Instant smokes that work directly from spawn positions are highly valued in competitive play because they save time and can be thrown at round start without risking your player. Here are the most effective instant lineups for 2026:
Instant E-Box Smoke from T Spawn: Stand in the back left corner of T spawn (facing mid). Aim at the specific notch in the skybox edge, approximately two finger-widths to the right of the building corner. Use a jump-throw bind. This smoke lands on E-Box at the exact moment CTs might be taking mid control positions.
Instant Arches Smoke from T Spawn: From the same T spawn position, aim at the skybox edge near the middle of the arch structure visible in the distance. Jump-throw. This smoke lands on arches simultaneously with your E-Box smoke, giving your team immediate mid control potential.
Instant Heaven Smoke from T Spawn: Position yourself against the back wall of T spawn (facing A side). Aim at the specific palm tree branch that extends leftward, aiming for the junction where it meets the main trunk. Jump-throw. This smoke blocks heaven at round start, allowing your team to execute A immediately without waiting for smokes to land from closer positions.
These instant smokes are particularly effective on pistol rounds and eco rounds where saving time is crucial. I recommend practicing them in offline mode until you can hit them consistently.
Essential CT-Side Smoke Lineups
Counter-terrorist utility on Anubis is all about delaying terrorist executes, enabling rotations, and setting up favorable retakes. While CT smokes are used less frequently than T smokes, knowing the right ones can save rounds:
Mid Denial Smokes
Denying terrorists mid control early in the round is crucial for CT success. These smokes prevent Ts from establishing mid presence and gaining map control:
Connector Smoke from CT Spawn: Position yourself in CT spawn near the A heaven area. Aim at the top of the structure visible through connector toward mid. Left-click throw. This smoke blocks terrorists’ vision from mid into connector, preventing them from pushing.
Mid Water Smoke from Connector: Move into connector and position yourself near the entrance to A site. Aim at the water area visible in mid. Left-click throw. This smoke blocks vision across mid water, making it difficult for terrorists to cross.
These smokes are most effective in the first 20-30 seconds of the round when terrorists are trying to establish mid control. Use them to buy time for your team to get information and set up defenses.
Rotate Cut-Off Smokes
These smokes are designed to delay terrorist rotations or block CT reinforcements when executing a site. Timing is key:
CT Spawn Smoke from A Site: When terrorists execute A, position yourself on A site near heaven. Aim at the CT spawn area visible in the distance. Left-click throw. This smoke delays CT rotations from spawn to A site, giving your team more time for the plant and setup.
Cave Smoke from B Site: When defending B, position yourself near palace. Aim at the cave entrance. Left-click throw. This smoke blocks CT vision from cave into B site, making retakes more difficult for the enemy team.
These rotate cut-off smokes are situational and depend on reading the enemy’s strategy. Use them when you anticipate the enemy team needs to rotate quickly.
Retake Smokes
When your team needs to retake a site, smokes can block enemy vision and enable safe entry. These are crucial for clutch situations and coordinated retakes:
Heaven Smoke for A Retake: When retaking A, position yourself in connector or A main. Aim at the heaven area where terrorists might be holding. Left-click throw. This smoke blocks any terrorists holding heaven from seeing your retake approach.
Palace Smoke for B Retake: When retaking B, position yourself in long or near CT spawn. Aim at the palace area overlooking the site. Left-click throw. This smoke blocks terrorists holding palace from seeing your retake.
Backsite Smoke for B Retake: From the same retake position, aim at the backsite area. Left-click throw. This smoke blocks terrorists hiding in backsite from catching your team off guard during the retake.
For successful retakes, coordinate your smokes with teammates. Having multiple smokes land simultaneously creates chaos for the defending terrorists and enables your team to retake with minimal casualties.
Utility Beyond Smokes
While smokes are essential, Anubis utility extends beyond smoke grenades. Molotovs, flashbangs, and HE grenades all play important roles in successful executes and defenses. I’ve found that the best players use all utility types in combination rather than relying on smokes alone.
Key Molotov Lineups
Molotovs (or incendiaries for CT) are incredibly powerful on Anubis for clearing corners and denying plant positions. Here are the most effective lineups:
Heaven Molotov from A Main: Position yourself in A main near the boxes. Aim at the roof edge of heaven, slightly to the left of center. Use a left-click throw with slight forward movement. This molotov forces any CT holding heaven to flee or take damage, clearing the dominant angle.
Palace Molotov from Long: After moving down B long, position yourself near the gate. Aim at the roof of the palace structure. Left-click throw. This molotov clears any CTs holding palace, enabling your team to enter B site safely.
Water Molotov from Connector: Position yourself in connector facing mid water. Aim at the water surface near the edge. Left-click throw. This molotov denies any terrorists hiding in water and can catch pushing enemies off guard.
Plant Zone Molotovs: For both A and B sites, throwing molotovs onto common plant positions can prevent or delay the plant. This is particularly effective in post-plant situations when you’re trying to run down the clock.
Flashbang Setups
Flashbangs are essential for successful entries and retakes. Properly coordinated flashes can blind entire enemy teams and enable clean takes. Here are effective flash setups:
Heaven Flash from A Main: When executing A, have a teammate throw a flash over the wall toward heaven while another player pushes. This flash blinds any CTs holding heaven and enables your entry fragger to push safely.
Connector Flash for B Execute: When executing B, throw a flash off the wall in connector toward the site. This flash blinds CTs holding common positions on B and enables your team to enter.
Pop-Flashes: Learning pop-flash positions (where the flash explodes as soon as it becomes visible to the enemy) is a skill that separates good players from great ones. Practice throwing flashes that peak over walls and corners just as your teammate pushes.
Team Flash Coordination: The most effective flashbang usage requires coordination. Designate one player as the primary flash thrower for executes, and ensure your team knows not to look at the flash throwing location.
HE Grenade Positions
HE grenades can damage enemies holding common positions or finish off low-health opponents. Here are valuable HE positions on Anubis:
Heaven HE from A Main: Similar to the molotov lineup, this HE can damage or kill CTs holding heaven. It’s particularly effective when you know an AWPER is holding that position.
Palace HE from Long: This HE can damage CTs holding palace before your team enters B site. It’s especially effective when combined with a smoke to prevent the CT from escaping.
Mid HE from Connector: This HE can damage terrorists contesting mid control. Throw it toward common mid positions like E-box or arches to catch pushing enemies.
Post-Plant HEs: After planting, throwing HEs toward common defuse positions can damage or kill CTs trying to retake. This is particularly effective in combination with molotovs to control the site.
Utility Combinations
The most effective utility usage combines multiple grenade types in coordinated sequences. Here are powerful combinations I use regularly:
A Execute Combo: Heaven smoke → Heaven flash → Entry fragger push → Connector smoke → Molotov heaven post-plant. This sequence clears the dominant angles, enables safe entry, and secures the site after planting.
B Execute Combo: Long smoke → Palace smoke → Palace flash → Entry fragger push → Backsite smoke → Molotov palace post-plant. This combo neutralizes the dangerous B site positions and sets up a strong post-plant defense.
Mid Control Combo: E-box smoke → Arches smoke → HE toward connector → Flash over mid → Take mid control. This sequence establishes mid dominance while potentially damaging CTs contesting.
Practice these utility combinations with your team. The coordination required is challenging to master but pays off significantly in match results.
Practice Commands and Setup
Mastering these callouts and utility lineups requires practice. CS2 provides excellent offline practice tools that let you refine your skills without pressure. Here are the essential commands and setup recommendations for effective practice sessions:
Essential Practice Commands
These console commands enable offline practice mode with unlimited utility and grenade guidance. Open your console (typically the tilde ~ key) and enter these commands:
sv_cheats 1 – Enables cheat commands for offline play
sv_infinite_ammo 1 – Provides unlimited ammunition and grenades
mp_buy_anywhere 1 – Allows buying from any location on the map
mp_buytime 9999 – Extends buy time indefinitely
mp_restartgame 1 – Restarts the round (useful for resetting positions)
mp_freezetime 0 – Removes freeze time for faster practice
mp_roundtime_defuse 60 – Sets round time to 60 minutes for extended practice
bind alt "noclip" – Optional: bind noclip to alt for flying around the map
sv_grenade_trajectory_prac_pipreview 1 – Shows grenade trajectory preview line
With these commands enabled, you can practice smoke lineups indefinitely without running out of grenades. I recommend starting practice sessions with these commands to build muscle memory for each throw.
Jump-Throw Bind Setup
Many smoke lineups require a jump-throw technique (releasing the grenade at the peak of your jump). To ensure consistency, set up a jump-throw bind:
alias "+jumpthrow" "+jump;-attack"
alias "-jumpthrow" "-jump"
bind "alt" "+jumpthrow"
This bind ensures that your grenade releases at the exact same point in your jump every time, eliminating human error from timing. The jump-throw technique is essential for many of the lineups in this guide, particularly heaven smoke from T spawn and various instant smokes.
Practice Routine Recommendations
Effective practice requires structure and focus. Here’s the routine I recommend for mastering Anubis utility:
Day 1: Mid Control Smokes (30 minutes) – Focus on E-box, arches, and connector smokes from various positions. Practice until you can hit each smoke 10 times in a row without missing.
Day 2: A Site Smokes (30 minutes) – Practice heaven, connector, and A main smokes. Focus on the heaven smoke from T spawn as it’s the most critical.
Day 3: B Site Smokes (30 minutes) – Practice long, palace, B-gate, and backsite smokes. Each smoke should be practiced from multiple spawn positions.
Day 4: Instant Smokes (30 minutes) – Focus exclusively on instant spawn smokes. These are the hardest but most valuable lineups.
Day 5: Molotovs and Flashbangs (30 minutes) – Practice utility combos that combine smokes with molotovs and flashes.
Day 6: Full Execute Practice (45 minutes) – Simulate full round executes using all utility types. Practice with bots or teammates if possible.
Day 7: Review and Refine (30 minutes) – Identify which smokes you struggled with during the week and focus practice on those specific lineups.
Consistency is key. Even 15-30 minutes of focused practice daily will significantly improve your utility game within 2-3 weeks. I’ve personally seen players go from missing basic smokes to hitting instant lineups consistently after following this routine for a month.
Frequently Asked Questions
How to smoke Anubis CS2?
To smoke effectively on Anubis in CS2, focus on the essential utility for your team side. Terrorists should prioritize mid control smokes (E-box, arches, connector) followed by site-specific smokes (heaven for A, palace for B). Counter-terrorists should focus on mid denial smokes early in the round and retake smokes when sites are attacked. Practice each lineup offline using sv_cheats and sv_infinite_ammo commands until you can hit them consistently.
How to smoke con from T spawn Anubis?
To smoke connector from T spawn on Anubis, position yourself in the back left corner of T spawn facing toward mid/connector. Aim at the notch in the skybox edge approximately two finger-widths to the right of the building corner. Use a jump-throw bind for consistency. This is an instant smoke that lands on connector at round start, denying CT vision into mid and enabling your team to take mid control safely. Practice this lineup offline as it’s one of the most valuable instant smokes on the map.
What is the command for smokes in CS2?
The essential console commands for practicing smokes in CS2 are: sv_cheats 1 (enables cheat commands), sv_infinite_ammo 1 (provides unlimited grenades), mp_buy_anywhere 1 (allows buying from anywhere), mp_buytime 9999 (extends buy time), mp_restartgame 1 (restarts rounds), and sv_grenade_trajectory_prac_pipreview 1 (shows grenade trajectory line). For jump-throw smokes, also set up a bind with: alias “+jumpthrow” “+jump;-attack”, alias “-jumpthrow” “-jump”, and bind “alt” “+jumpthrow”.
How to smoke heaven Anubis CS2?
To smoke heaven on Anubis in CS2, position yourself in T spawn against the wall near the barrier. Aim at the top of the palm tree on the left side of heaven, slightly to the right of the trunk peak. Use a jump-throw bind for maximum consistency. This smoke blocks the dominant heaven angle, which is crucial for successful A site executes. Heaven is the most important CT position on A site, so mastering this smoke should be a priority for any player serious about improving their Anubis gameplay.
Why did Anubis get removed from CS2?
Anubis was not permanently removed from CS2 but has undergone several updates and temporary rotations in the active duty map pool. The map received significant changes including new holes, adjusted sightlines, and modified positions that affected utility lineups. These updates require players to relearn certain smoke positions. As of 2026, Anubis remains part of the competitive map pool and continues to be played in professional matches, Premier mode, and standard matchmaking. Always check for recent patch notes as map updates can significantly impact utility.
Conclusion
Mastering CS2 Anubis guide callouts and smokes takes time and practice, but the competitive advantage is worth the investment. This comprehensive guide has provided you with complete callout references for every position on the map, essential smoke lineups for both T and CT sides, and the practice commands to master them offline.
Start by memorizing the callouts for each site and mid area. Clear communication is the foundation of successful CS2 gameplay, and knowing exactly where your teammates are calling enemy positions will dramatically improve your team’s coordination. Then focus on the essential smokes for your preferred side—mid control smokes for terrorists and mid denial smokes for counter-terrorists.
Set up a consistent practice routine using the commands provided in this guide. Even 15-30 minutes of focused practice daily will build muscle memory for these lineups. I recommend starting with the most critical smokes—heaven smoke for A executes and palace smoke for B executes—before moving on to more advanced utility combinations.
Remember that utility is most effective when used in coordination with your team. Communicate which smokes you’re throwing, time them together for maximum impact, and combine smokes with molotovs and flashbangs for complete site control. The best CS2 players use utility as a coordinated team effort, not just individual grenade throws.
Take this CS2 Anubis guide and apply it in your next practice session. Within a few weeks of consistent practice, you’ll notice significant improvement in your Anubis gameplay, better team communication, and more successful round outcomes. Good luck on the server, and may your smokes always land on target.