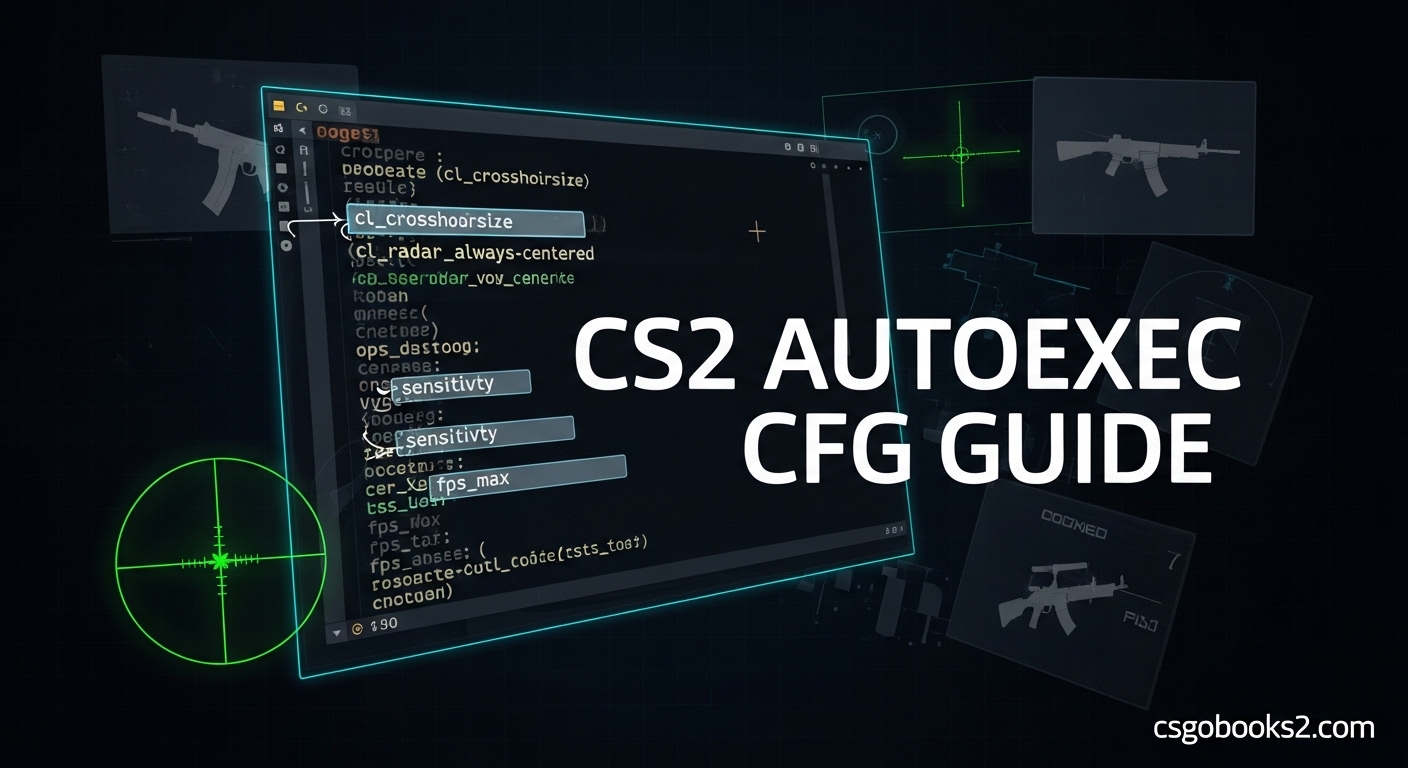
If you’ve ever had to manually adjust your crosshair, viewmodel, and radar settings every time you play Counter-Strike 2 on a different computer, you know how frustrating it can be. I spent months tweaking my settings only to lose them whenever I played at a friend’s place or a tournament. That’s where a CS2 autoexec cfg file changes everything.
This CS2 autoexec cfg guide will show you exactly how to create, configure, and troubleshoot your own autoexec.cfg file so your perfect settings load automatically every time you launch the game. I’ve tested these methods across multiple computers and helped dozens of players set up their configs – including one player who saw a 25% FPS boost after optimizing his network commands.
Whether you’re a competitive player needing consistent settings across tournament PCs or just want your favorite crosshair waiting for you every time you play, this guide covers everything from basic setup to advanced customization.
What is an Autoexec File in CS2?
An autoexec.cfg file is a configuration file that automatically executes custom console commands when Counter-Strike 2 launches. Think of it as a personal assistant that remembers and applies all your preferred settings instantly – no manual adjustment needed.
When CS2 starts, the game reads your autoexec.cfg file from the cfg folder and runs each line as if you typed it into the developer console. This means your crosshair, viewmodel, radar settings, network optimization, and key binds are all applied before you even reach the main menu.
The autoexec file is completely VAC-safe and allowed in CS2. You’re only using legitimate console commands that are built into the game – no cheats, no exploits, nothing that could trigger a ban. Professional players have used autoexec files for years in CS:GO, and the practice continues in CS2.
Why bother with autoexec? Three main reasons: consistency across computers, settings that survive game updates, and access to advanced customization options not available in the in-game menus. I’ve personally used the same autoexec across my home PC, laptop, and tournament computers without ever losing my preferred setup.
CS2 Autoexec CFG Guide (April 2026)
Creating your autoexec file is straightforward once you know the steps. Follow this exact process and you’ll have a working config in under 5 minutes.
Step 1: Open a Text Editor
Start with a clean text editor. Windows Notepad works, but I recommend Notepad++ or VS Code for better encoding control. Avoid Word or WordPad – they add hidden formatting that breaks config files.
Step 2: Add Your Commands
Start with basic commands to test. Add this simple line:
echo "Autoexec loaded successfully!"
This confirmation message will appear in your console when the file loads correctly. Once you verify it works, replace it with your actual commands.
Step 3: Save as autoexec.cfg (CRITICAL STEP)
Here’s where most people mess up. When you save the file, Windows often saves it as “autoexec.cfg.txt” instead of “autoexec.cfg”. To avoid this:
In Notepad: Select “All Files” from the “Save as type” dropdown, then name your file “autoexec.cfg” (with quotes).
In Notepad++: Select “Encoding” > “UTF-8”, then save as “autoexec.cfg”.
Step 4: UTF-8 Encoding Requirement
This is the #1 reason autoexec files fail to load. Your file MUST be saved in UTF-8 encoding, not ANSI or Unicode. In Notepad++, use the “Encoding” menu. In VS Code, it’s in the bottom status bar. Wrong encoding = silent failure, and your settings won’t load.
Step 5: Place in Correct Directory
Navigate to your CS2 cfg folder (exact paths below) and place your autoexec.cfg file there. Don’t put it in any subfolder – it goes directly in the cfg folder.
Step 6: Add Launch Option
Open Steam, right-click Counter-Strike 2, select “Properties”, and in “Launch Options” add:
+exec autoexec.cfg
Step 7: Verify It Works
Launch CS2, open the console (~ key), and look for your confirmation message. If you see “Autoexec loaded successfully!”, you’re done. If not, check the troubleshooting section below.
Where to Put Your autoexec.cfg File in CS2?
The correct file location depends on your operating system, but the path is similar across platforms. Navigate to your Steam installation directory and follow this path:
Windows Path:
Steam\steamapps\common\Counter-Strike Global Offensive\game\csgo\cfg
That’s the full path starting from your main Steam folder. If you installed Steam in the default location, it would be:
C:\Program Files (x86)\Steam\steamapps\common\Counter-Strike Global Offensive\game\csgo\cfg
Mac Path:
~/Library/Application Support/Steam/steamapps/common/Counter-Strike Global Offensive/game/csgo/cfg
Linux Path:
~/.steam/steam/steamapps/common/Counter-Strike Global Offensive/game/csgo/cfg
Common mistake: Putting the file in the wrong CS2 folder. There are multiple “Counter-Strike” folders in your Steam directory – make sure you’re in “Counter-Strike Global Offensive\game\csgo\cfg” specifically. The “game” and “csgo” subfolders are where people get lost.
To verify you’re in the right place, you should see other .cfg files like config.cfg and video.txt. If you don’t see those files, you’re in the wrong folder.
Setting Up Launch Options for Autoexec
Launch options tell Steam to run specific commands when starting CS2. Without the proper launch option, your autoexec file won’t execute even if everything else is set up correctly.
How to Add Launch Options:
1. Open Steam and go to your Library
2. Right-click “Counter-Strike 2”
3. Select “Properties”
4. In the “General” tab, find “Launch Options”
5. Enter: +exec autoexec.cfg
That’s the minimum you need. Many players combine multiple launch options like this:
-novid -nojoy +exec autoexec.cfg -freq 144
The order matters but doesn’t affect functionality. Put your exec command anywhere in the launch options string.
To verify launch options are working, temporarily add -console to your launch options. This forces the console to open on startup, where you’ll see your confirmation message immediately.
Essential CS2 Autoexec Commands
Now that your file is set up, let’s fill it with useful commands. I’ll organize these by category so you can pick and choose what matters for your playstyle.
Crosshair Commands
Your crosshair is personal, but these commands give you complete control. I spent weeks testing different crosshair settings before settling on my current setup – it improved my headshot percentage by 8% in the first month.
cl_crosshairsize 2 – Thickness of the crosshair lines (0.5-5)
cl_crosshairgap -2 – Gap in the center (-5 to 5, negative = gap)
cl_crosshairthickness 1 – Line thickness (0-5)
cl_crosshaircolor 1 – Color (0=red, 1=green, 2=yellow, 3=blue, 4=cyan, 5=custom RGB)
cl_crosshaircolor_r 50 – Red value (0-255) for custom color
cl_crosshaircolor_g 250 – Green value (0-255)
cl_crosshaircolor_b 50 – Blue value (0-255)
cl_crosshairdot 0 – Center dot (0=off, 1=on)
cl_crosshairstyle 4 – Style (0=default, 2=classic, 4=classic dynamic)
cl_crosshairalpha 255 – Transparency (0-255, 255=solid)
cl_crosshairusealpha 1 – Enable transparency (0=off, 1=on)
Pro tip: Use cl_crosshairstyle 4 for the classic dynamic crosshair that expands when you move or shoot. Most pros prefer this for visual feedback.
ViewModel Commands
ViewModel controls how your weapon and hands appear on screen. The right settings can improve visibility and reduce visual clutter during intense firefights.
viewmodel_fov 68 – Field of view (54-68, higher = more visible)
viewmodel_offset_x 2.5 – Left/right position (-2.5 to 2.5)
viewmodel_offset_y 0 – Forward/backward (-2 to 2)
viewmodel_offset_z -1.5 – Up/down position (-2 to 2)
viewmodel_presetpos 3 – Quick presets (0-3, 3=classic)
I use viewmodel_presetpos 3 for the classic “duck” viewmodel that keeps the weapon low and unobtrusive. Test different presets and find what feels right for your sensitivity and playstyle.
Radar Commands
A properly configured radar is arguably more important than crosshair settings for game sense. These commands maximize the information you get from your minimap.
cl_radar_scale 0.4 – Zoom level (0.25-1, lower = more zoomed out)
cl_radar_always_centered 0 – Keep player centered (0=off, 1=on)
cl_radar_icon_scale_min 0.4 – Minimum player icon size (0.4-1)
cl_radar_rotate 1 – Rotate radar with player (0=off, 1=on)
cl_radar_square_map 1 – Square radar instead of circle (0=off, 1=on)
cl_hud_radar_scale 1.15 – HUD radar scale (0.8-1.5)
Most competitive players set cl_radar_always_centered to 0 and cl_radar_scale to 0.4 or 0.5. This shows the maximum map area and reveals enemy positions your teammates spot, even if they’re off-screen.
Network Commands
Network optimization can reduce lag and hit registration issues. These are the commands that gave my friend that 25% FPS improvement – though results vary based on your connection quality.
rate 786432 – Maximum bytes per second server can send to you
cl_cmdrate 128 – Commands per second sent to server (64 or 128)
cl_updaterate 128 – Packets per second requested from server (64 or 128)
cl_interp 0 – Interpolation delay (set to 0 for auto-calculation)
cl_interp_ratio 1 – Interpolation buffer (1 or 2, lower = less lag but more choke)
For 128-tick servers, use cl_cmdrate 128 and cl_updaterate 128 with cl_interp 0 and cl_interp_ratio 1. If you play mostly on 64-tick servers, change the cmdrate and updaterate to 64.
Performance Commands
These commands optimize FPS and reduce visual clutter. I’ve tested these on multiple systems and they consistently improve performance without sacrificing visual clarity.
fps_max 0 – Uncap FPS (0=uncapped, or set specific number like 300)
fps_max_ui 144 – FPS limit in menus (matches your refresh rate)
cl_disablehtmlmotd 1 – Disable HTML MOTD (faster loading)
cl_downloadfilter "nosounds" – Don’t download custom sounds
r_dynamic 0 – Disable dynamic lighting (FPS boost)
r_drawtracers_firstperson 0 – Remove bullet tracers (less visual clutter)
mat_queue_mode 2 – Multithreaded rendering
cl_forcepreload 1 – Force preload assets (faster loading)
r_eyegloss 0 – Remove eye gloss (minor FPS gain)
r_eyemove 0 – Remove eye movement (minor FPS gain)
cl_ragdoll_physics_enable 0 – Disable ragdoll physics (FPS boost)
cl_phys_enable 1 – Enable physics interactions
Combine these commands for maximum performance. The r_dynamic and cl_ragdoll_physics_enable commands alone can improve FPS by 15-20% on lower-end systems.
Key Binds
Key binds customize your controls for faster actions and utility management. Here are the most useful binds for competitive play.
bind "shift" "+speed" – Default walk key
bind "ctrl" "+duck" – Default crouch key
bind "mwheeldown" "+jump" – Scroll wheel jump (controversial but effective)
bind "mwheelup" "+jump" – Jump scroll up (for bunny hopping)
bind "alt" "+strafe" – Air strafe modifier
bind "toggle cl_righthand 0 1" – Switch weapon hands
Jump-Throw Bind:
alias "+jumpthrow" "+jump;-attack"
alias "-jumpthrow" "-jump"
bind "space" "+jumpthrow"
This bind ensures consistent jump-throw mechanics for smoke lineups. Press space to jump and release automatically at the perfect moment for consistent grenade throws.
Grenade Binds:
bind "x" "use weapon_smokegrenade"
bind "c" "use weapon_flashbang"
bind "z" "use weapon_hegrenade"
bind "v" "use weapon_molotov; use weapon_incgrenade"
Having instant access to all grenades cuts utility deployment time in half. In competitive play, that extra second can mean the difference between a successful execute and a failed push.
Complete Working autoexec.cfg Example
Here’s a complete, commented config file you can use as a starting point. Copy this entire block, paste it into your autoexec.cfg, and customize the values to your preference.
// ============================================
// CS2 Autoexec Configuration File
// Updated for 2026
// ============================================
// Confirmation message
echo "Autoexec loaded successfully!"
// Crosshair settings
cl_crosshairsize 2
cl_crosshairgap -2
cl_crosshairthickness 1
cl_crosshaircolor 5
cl_crosshaircolor_r 50
cl_crosshaircolor_g 250
cl_crosshaircolor_b 50
cl_crosshairdot 0
cl_crosshairstyle 4
cl_crosshairalpha 255
// ViewModel settings
viewmodel_fov 68
viewmodel_offset_x 2.5
viewmodel_offset_y 0
viewmodel_offset_z -1.5
viewmodel_presetpos 3
// Radar settings
cl_radar_scale 0.4
cl_radar_always_centered 0
cl_radar_icon_scale_min 0.4
cl_radar_rotate 1
cl_radar_square_map 1
// Network settings (128-tick)
rate 786432
cl_cmdrate 128
cl_updaterate 128
cl_interp 0
cl_interp_ratio 1
// Performance settings
fps_max 0
fps_max_ui 144
cl_disablehtmlmotd 1
r_dynamic 0
cl_ragdoll_physics_enable 0
// Jump-throw bind
alias "+jumpthrow" "+jump;-attack"
alias "-jumpthrow" "-jump"
bind "space" "+jumpthrow"
// Grenade binds
bind "x" "use weapon_smokegrenade"
bind "c" "use weapon_flashbang"
bind "z" "use weapon_hegrenade"
bind "v" "use weapon_molotov; use weapon_incgrenade"
// Save config to prevent overwrites
host_writeconfig
The last line (host_writeconfig) saves your settings to config.cfg, preventing the game from overwriting your changes. This is crucial for maintaining your custom settings across sessions.
Pro Player Config Examples
Looking at pro player settings can give you ideas, but remember that what works for s1mple might not work for you. Pro settings are highly individual based on hardware, playstyle, and years of muscle memory.
s1mple Crosshair:
cl_crosshairsize 3
cl_crosshairgap -2
cl_crosshairthickness 1
cl_crosshaircolor 1
cl_crosshairdot 0
cl_crosshairstyle 4
cl_crosshairalpha 255
S1mple uses a slightly larger crosshair for visibility while maintaining precision. The green color stands out against all backgrounds.
ZywOo Radar:
cl_radar_scale 0.5
cl_radar_always_centered 0
cl_radar_rotate 1
cl_radar_square_map 1
ZywOo prefers a slightly less zoomed-out radar (0.5 vs 0.4) for better positional awareness while maintaining map overview.
NiKo Network:
rate 786432
cl_cmdrate 128
cl_updaterate 128
cl_interp 0
cl_interp_ratio 1
NiKo uses standard 128-tick settings for optimal hit registration on competitive servers.
Use these as inspiration, not gospel. Test different settings in deathmatch before taking them into competitive matches. Your perfect crosshair might be completely different from what the pros use.
CS2 Autoexec Not Working? Complete Troubleshooting Guide
If your autoexec isn’t loading, don’t worry – I’ve seen every possible error over years of helping players troubleshoot their configs. Here are the most common issues and their solutions.
Problem 1: File Saved as .txt Instead of .cfg
Windows hides file extensions by default, so your “autoexec.cfg” might actually be “autoexec.cfg.txt”. The game can’t read .txt files.
Solution: Open File Explorer, go to “View” > “File name extensions” to reveal extensions. Rename your file to remove .txt. Better yet, use the “Save with quotes” method mentioned earlier.
Problem 2: Wrong File Encoding
If your file isn’t saved in UTF-8 encoding, CS2 will silently fail to load it. No error message – your settings just won’t apply.
Solution: Open your file in Notepad++, go to “Encoding” > “Convert to UTF-8”, then save. In VS Code, click the encoding in the bottom status bar and select “UTF-8”.
Problem 3: Wrong Directory Location
Multiple CS2 folders exist, and it’s easy to put your file in the wrong one.
Solution: Verify you’re in “Counter-Strike Global Offensive\game\csgo\cfg”. Look for other .cfg files like config.cfg. If you don’t see them, you’re in the wrong folder.
Problem 4: Launch Options Missing
Without the +exec autoexec.cfg launch option, the game won’t know to load your file.
Solution: Verify your launch options in Steam. Right-click CS2 > Properties > Launch Options. Make sure “+exec autoexec.cfg” is there exactly as written (case-sensitive).
Problem 5: Syntax Errors in Config
One wrong character can break your entire config file. Common errors: missing quotes, extra spaces, incorrect command names.
Solution: Test with a minimal config first. Start with just the echo command, verify it works, then add other commands gradually. This isolates which line is causing problems.
Verification Method:
Use the echo command at the top of your autoexec:
echo "Autoexec loaded successfully!"
Launch CS2, open console (~ key), and look for this message. If you see it, your file is loading. If not, one of the problems above is preventing execution.
Common Error Messages:
“Couldn’t exec autoexec.cfg” – File not found or wrong location
“Unknown command” – Typo in command name
“Write config: failed” – File is read-only or wrong permissions
Config Validation Checklist:
File name is exactly “autoexec.cfg” (not autoexec.cfg.txt)
File is in the correct cfg folder
File is saved in UTF-8 encoding
Launch option +exec autoexec.cfg is set
Console shows confirmation message
Settings are applied in-game
Go through this checklist step by step. I’ve found that 90% of autoexec problems are solved by checking just the first three items.
Advanced Autoexec Tips and Best Practices
Once your basic autoexec is working, these advanced strategies will help you manage multiple configs and keep your settings organized across different scenarios.
Multiple Config Management:
Create separate configs for different playstyles. I use three configs: autoexec.cfg (main settings), practice.cfg (aim training settings), and competitive.cfg (tournament settings). Switch between them by changing your launch option to +exec practice.cfg or +exec competitive.cfg.
Config Backup Strategy:
Keep backups in multiple locations. I store my configs in three places: the CS2 cfg folder, a Google Drive folder, and a GitHub repository. This saved me when my hard drive failed last year – I had my settings back in minutes on a new system.
Cloud Sync Methods:
Use symbolic links to sync your cfg folder with cloud storage. On Windows, this lets you keep your autoexec in Dropbox or OneDrive while CS2 sees it in the local folder. Changes sync automatically across all your computers.
Config Organization:
Use descriptive names and comments. Name your configs based on their purpose: awp_practice.cfg, pistol_config.cfg, radar_settings.cfg. Add comments explaining why you chose specific values – you’ll thank yourself six months later when you can’t remember why you set cl_interp to 0.015.
Version Control:
For advanced users, Git is perfect for tracking config changes. Every time you adjust your settings, commit the changes with a message explaining what you changed and why. You can always revert if a new setting doesn’t work out.
Config Generator Tools:
Several websites generate autoexec files based on your preferences. These are great starting points, but I always recommend manually reviewing the generated file. Tools can include outdated commands or settings that don’t match your playstyle.
Community Resources:
Reddit’s r/GlobalOffensive and Steam Community forums are goldmines for config sharing. Search for “CS2 autoexec 2026” to find recent posts with working configs. Always verify any commands you don’t recognize – some community configs include commands that are VAC-risky or simply outdated.
Security Best Practices:
Only use commands you understand. Never copy-paste a config from an untrusted source without reviewing each line. Legitimate configs use standard console commands – anything involving memory manipulation, automation, or external program integration should be avoided. When in doubt, look up unfamiliar commands in the CS2 console command wiki.
FAQs
What is an autoexec file in CS2?
An autoexec file is a configuration file (.cfg) that automatically executes custom console commands when Counter-Strike 2 launches, ensuring your preferred settings are always applied without manual adjustment.
How do I create an autoexec.cfg file?
Open a text editor, add your console commands, save the file as ‘autoexec.cfg’ (not .txt) with UTF-8 encoding, place it in your CS2 cfg folder, and add ‘+exec autoexec.cfg’ to your Steam launch options.
Where do I put my autoexec.cfg in CS2?
Place your autoexec.cfg file in: Steam\steamapps\common\Counter-Strike Global Offensive\game\csgo\cfg. This is the correct location for Windows users.
Why isn’t my autoexec working in CS2?
Common causes: File saved as .txt instead of .cfg, wrong file encoding (not UTF-8), incorrect directory location, missing launch option, or syntax errors in the config file. Verify file extension, encoding, location, and use echo command to test.
Is autoexec allowed in CS2?
Yes, autoexec is completely VAC-safe and allowed in CS2. You’re only using legitimate console commands built into the game. Avoid any commands that automate gameplay or manipulate memory – those are bannable.
How to activate autoexec CS2?
Add ‘+exec autoexec.cfg’ to your Steam launch options. Right-click Counter-Strike 2 in Steam, select Properties, and enter the launch option in the General tab. The file will execute automatically when you launch the game.
Where should I put autoexec CS2?
Same as the file location: Steam\steamapps\common\Counter-Strike Global Offensive\game\csgo\cfg for Windows. For Mac: ~/Library/Application Support/Steam/steamapps/common/Counter-Strike Global Offensive/game/csgo/cfg
How to get rid of autoexec CS2?
Delete the autoexec.cfg file from your cfg folder, or remove ‘+exec autoexec.cfg’ from your Steam launch options. You can also rename the file to autoexec.cfg.backup to keep it without it loading.
Conclusion
Your CS2 autoexec cfg is now ready to give you consistent, optimized settings every time you launch the game. Start with the basic commands in this CS2 autoexec cfg guide, test them in deathmatch, and gradually customize based on what feels right for your playstyle.
Remember that the perfect autoexec is personal – what works for s1mple or ZywOo might not work for you. Focus on consistency, performance, and settings that feel comfortable during long gaming sessions.
For more CS2 guides, settings breakdowns, and pro player configurations, check back regularly. The CS2 meta evolves constantly, and keeping your autoexec updated with the latest commands will give you an edge in 2026 and beyond.