A CS2 jump throw bind is a console command that lets you jump and release a grenade with a single keypress, ensuring consistent smoke and grenade lineups. If you’ve been struggling to land your smokes in the exact same spot every time, or if you’re wondering why your old CS:GO jumpthrow binds stopped working, you’re not alone. In this guide, I’ll explain everything you need to know about CS2 jump throw bind essential binds, including the major engine changes Valve made in August 2023 that changed how jumpthrows work forever.
Whether you’re a competitive player looking to perfect your utility usage or a casual player wanting to improve your game, understanding jumpthrows in CS2 is crucial for team coordination and map control. Let me walk you through exactly what changed, how to adapt, and which binds will give you the edge in 2026.
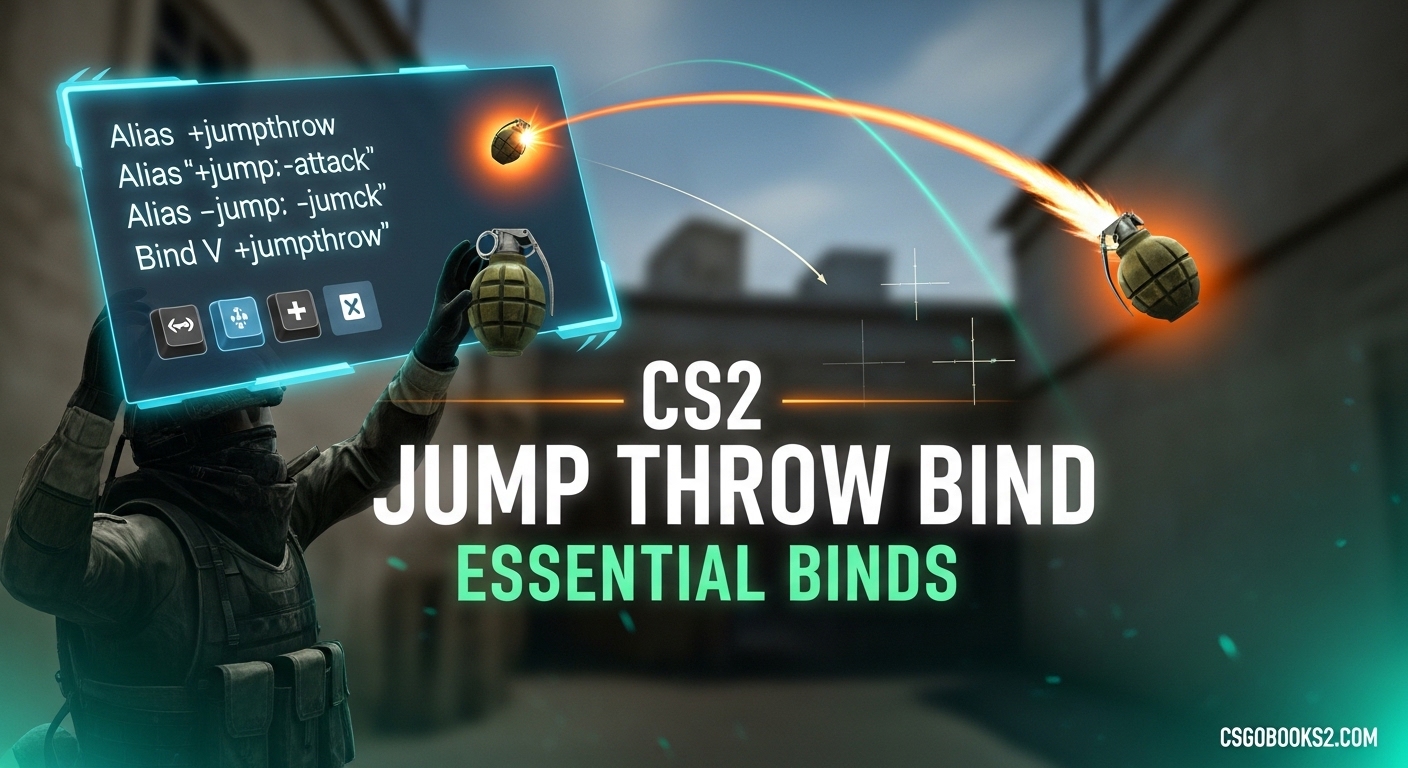
What Is a CS2 Jump Throw Bind?
A CS2 jump throw bind is a customized key binding that combines the jump and grenade throw actions into a single command. When you press the bound key, your character jumps and releases the grenade at the precise moment needed for maximum consistency. This is essential for smoke lineups because it eliminates human timing variations – every throw lands in the exact same spot when executed from the same position.
Jump throw binds work by creating an alias that chains the +jump, -jump, and -attack commands together. This alias is then bound to a key of your choice. Before August 2023, this was the standard way competitive players ensured their smokes landed consistently on maps like Mirage, Overpass, and Nuke. The bind meant you didn’t need to manually time your throw at the peak of your jump – the game handled it for you perfectly every time.
However, CS2 jump throw bind functionality changed significantly with Valve’s August 2023 update. Traditional alias-based binds were disabled as part of Valve’s crackdown on Snap Tap and similar automation features. This left many players confused about whether jumpthrow binds still work at all, and if not, what they should use instead.
CS2 Jump Throw Bind Changes Explained 2026
In August 2023, Valve made fundamental changes to the CS2 engine that affected how CS2 jump throw bind essential binds function. These changes came as part of Valve’s response to the Snap Tap controversy – a feature that automated movement inputs to give players an advantage. In their efforts to eliminate automation, Valve disabled traditional alias commands that chained actions together, which is exactly how jumpthrow binds worked.
Here’s what actually changed: traditional binds using the alias command to chain +jump, -jump, and -attack no longer function in CS2. When players tried their old CS:GO configs, they found their jumpthrow binds simply didn’t work. This caused massive confusion in the community, with Reddit threads full of players asking “Are jump throw binds no longer a thing in CS2?”
However, Valve didn’t leave players completely without options. Instead of traditional binds, CS2 now uses a 200ms error margin window for grenade throws during jumps. This means that as long as you throw your grenade within 200 milliseconds of the peak of your jump, the game will treat it as if you threw at the exact peak. This window is much more forgiving than CS:GO ever was, making manual jumpthrows significantly more consistent than before.
The key difference is that instead of automating the timing with a bind, CS2 now makes manual timing more forgiving. You still need to press jump and throw at roughly the right time, but the 200ms window gives you plenty of leeway. This is why many players report that jumpthrows feel “automatic” now – as long as your timing is reasonably close to the jump peak, CS2 ensures consistent throws.
For players who still prefer a traditional bind experience, there is a workaround using scancode-specific bindings that bypass some of Valve’s restrictions. I’ll cover that in the setup sections below. But first, it’s important to understand that the new 200ms error margin system was designed to be more accessible while still preventing the type of automation Valve wanted to eliminate.
How to Create a Jump Throw Bind in CS2?
Creating a CS2 jump throw bind requires using the developer console and understanding the new limitations in CS2. The traditional method still works with some modifications, though you may need to use scancode bindings for certain keys. Here’s the step-by-step process to set up your jumpthrow bind using the console command method.
First, you need to enable the developer console. Launch CS2 and go to Settings > Game > Gameplay. Find the “Enable Developer Console” option and set it to “Yes.” The console is typically accessed by pressing the tilde key (~) below your escape key, though this can be changed in keyboard settings.
Once the console is enabled, press ~ to open it. You’ll need to create an alias that combines the jump and throw commands. The basic command structure is:
alias "+jumpthrow" "+jump;-attack"
alias "-jumpthrow" "-jump"
bind "alt" "+jumpthrow"
This creates an alias called +jumpthrow that starts both jumping and attacking, then a -jumpthrow alias that stops jumping. The bind command assigns this to the ALT key. You can replace “alt” with any key you prefer – common choices include mouse side buttons, X, Z, or mouse wheel down.
However, many players report issues with certain keys not working properly in CS2. This is due to key binding restrictions in the new engine. If your bind doesn’t work, try using scancode-specific binding instead:
bind "X" "+jumpthrow"
Using the letter X in quotes tells CS2 to use the scancode for that key, which bypasses some of the restrictions. This is particularly helpful if you’re having trouble binding specific keys like X, C, or mouse buttons.
After entering these commands, test your bind by equipping a grenade, pressing your bound key, and observing if your character jumps and throws at the same time. If it works, you should see consistent throws when practicing from the same position.
Autoexec Configuration Method
The autoexec.cfg method is preferred by players who want their CS2 jump throw bind to persist across sessions without manually entering commands each time. An autoexec file is a configuration file that CS2 automatically loads when the game starts, making it perfect for storing your binds permanently.
To create an autoexec file for CS2, navigate to your CS2 configuration folder. The default path is:
Steam\steamapps\common\Counter-Strike Global Offensive\game\csgo\cfg
In this folder, create a new text file and name it “autoexec.cfg” (make sure file extensions are visible so you don’t accidentally create autoexec.cfg.txt). Open this file with a text editor like Notepad and add your jumpthrow commands:
alias "+jumpthrow" "+jump;-attack"
alias "-jumpthrow" "-jump"
bind "alt" "+jumpthrow"
host_writeconfig
The host_writeconfig command at the end ensures CS2 saves these settings. Save the file and close it. Now you need to make sure CS2 actually loads this file at startup.
Launch CS2 and open the console. Type the following command:
exec autoexec
This manually loads your autoexec file. To make it load automatically every time CS2 starts, you may need to add the launch option +exec autoexec.cfg. Right-click CS2 in Steam, go to Properties > General > Launch Options, and add:
+exec autoexec.cfg
With this setup, your CS2 jump throw bind will be available every time you launch the game, and you won’t need to manually enter console commands. Just remember that if you modify your autoexec file, you’ll need to either restart CS2 or type “exec autoexec” in the console to reload the changes.
Run Jump Throw Bind Setup
A run jump throw bind is an advanced variation that allows you to throw grenades while moving, which is essential for certain smoke lineups that require a running start. This type of CS2 jump throw bind is more complex because it needs to account for your movement momentum while still ensuring consistent throws.
The run jumpthrow alias includes additional commands to handle movement:
alias "+runjumpthrow" "+forward;+jump;-attack;-forward"
alias "-runjumpthrow" "-jump;-forward"
bind "mouse5" "+runjumpthrow"
This alias starts moving forward, jumps, throws, then stops both jumping and moving forward. The -forward at the end prevents you from continuing to run after the throw, which is crucial for accuracy. This bind is particularly useful for smokes that require a running approach, such as certain Mirage window smokes or Overpass heaven cover throws.
When practicing with a run jump throw bind, start slow. Get comfortable with the timing and the movement before using it in competitive matches. It takes practice to learn exactly when to initiate the throw for different lineups, but once mastered, it adds a powerful tool to your utility arsenal.
Essential CS2 Binds Beyond Jump Throw
While a CS2 jump throw bind is arguably the most important utility bind, there are several other essential binds that can improve your gameplay. These CS2 binds essential commands help with grenade management, crosshair control, and overall game efficiency.
Grenade slot binds allow you to quickly select specific grenade types without cycling through your inventory:
bind "z" "slot6" (flashbang)
bind "x" "slot7" (smoke grenade)
bind "c" "slot8" (HE grenade)
bind "v" "slot9" (molotov/incendiary)
bind "mouse4" "slot10" (decoy)
These binds let you instantly pull out the grenade type you need, which is crucial in clutch situations where every millisecond counts. Instead of scrolling or pressing 4 multiple times, you can react instantly with the appropriate utility.
Another useful bind is the grenade lineup crosshair switch, which toggles between your regular crosshair and a special lineup crosshair when you have a grenade equipped:
bind "shift" "toggle cl_crosshairsize 3 1"
This changes your crosshair size when you hold shift, making it easier to align precise smoke lineups. You can adjust the values (3 and 1 in this example) to match your preferred crosshair sizes.
Volume change binds are also helpful for quickly adjusting game sound without pausing:
bind "kp_minus" "volume 0.1"
bind "kp_plus" "volume 0.1+"
These use the numpad minus and plus keys to decrease and increase volume respectively, letting you adjust on the fly during matches.
Map-Specific Smoke Lineups
Mastering a CS2 jump throw bind opens up powerful map-specific smoke lineups that can give your team a significant advantage. Here are three essential smoke lineups on popular competitive maps where jumpthrows are particularly valuable.
Mirage Window Smoke from Stairs: Stand at the edge of the stairs in apartments, aim at the top corner of the window frame, and use your jumpthrow bind. This smoke lands perfectly in window, blocking defenders’ vision and allowing your team to execute onto A site. The consistency provided by the bind ensures you don’t accidentally smoke short or leave a gap for defenders to see through.
Overpass Heaven Smoke from Bath: Position yourself in the corner of bathroom, aim at the specific point on the heaven wall (approximately midway up and slightly right of the protrusion), and execute your jumpthrow. This smoke lands in heaven, denying one of the most common defender positions on Overpass A site. Without a consistent bind, this lineup is notoriously difficult to replicate.
Nuke Outside Smoke from Secret: From the Secret area, aim at the distinctive vent pattern on the exterior wall and use your jumpthrow. This smoke lands outside, cutting off rotations and giving your team control of the exterior area. The precise timing required for this throw makes it nearly impossible to execute consistently without a bind or CS2’s 200ms error margin.
These are just a few examples – every competitive map has similar lineups where CS2 jump throw bind essential binds provide the consistency needed for team strategies. Practice these lineups in deathmatch or with bots before using them in competitive matches to ensure you can execute them under pressure.
Troubleshooting Common CS2 Jump Throw Bind Issues
Many players encounter problems when setting up their CS2 jump throw bind, especially if they’re used to CS:GO configs. Here are solutions to the most common issues based on community reports and troubleshooting.
Bind Not Working At All: If pressing your bound key does nothing, first verify the console is enabled and you’ve entered the commands correctly. Check for typos in the alias names and ensure you’re using the correct key name in quotes. Try using the scancode method with the letter in quotes: bind “X” “+jumpthrow” instead of bind x +jumpthrow.
Spacebar Stops Working: Some players report that after setting up a jumpthrow bind, their spacebar no longer jumps. This typically happens when the alias conflicts with your default jump binding. To fix it, explicitly rebind your spacebar: bind “space” “+jump”. Add this to your autoexec after your jumpthrow commands to ensure it loads every time.
Key Binding Conflicts: If you’re trying to bind a key that already has another function (like X for reload), your jumpthrow bind may not work. Either choose a different key or unbind the conflicting command first: unbind “x” then bind “x” “+jumpthrow”. Mouse side buttons can be excellent alternatives since they rarely have default bindings.
Bind Works Inconsistently: If your jumpthrow sometimes works and sometimes doesn’t, you may be experiencing the effects of CS2’s new engine limitations. The 200ms error margin means your timing still matters slightly. Practice your throws to develop muscle memory for the right moment to press the key. Alternatively, focus on perfecting manual throws within the 200ms window rather than relying entirely on the bind.
Autoexec Not Loading: If your binds disappear when you restart CS2, your autoexec file isn’t loading. Verify the file is named exactly “autoexec.cfg” (not autoexec.cfg.txt). Check that it’s in the correct folder path. Ensure you’ve added +exec autoexec.cfg to your launch options. You can test if it’s loading by adding a command that prints to console: echo “Autoexec loaded” and checking the console on startup.
Scancode Issues: Some keys simply won’t bind properly due to CS2’s input restrictions. If you’ve tried everything and a specific key won’t work, switch to a different key. Mouse buttons, numpad keys, and less-used letters like J, K, or L often work better than commonly-bound keys like X, C, or V.
FAQs
Are jump throw binds allowed in CS2?
Yes, jump throw binds are allowed in CS2. Unlike some automation features that Valve banned, jumpthrow binds using the alias command are permitted and widely used by competitive players. However, the traditional bind method changed with August 2023 updates, so you may need to use scancode-specific bindings or adapt to the new 200ms error margin system.
How to do jumpthrow now in CS2?
You can do jumpthrows in CS2 either by setting up a traditional bind using console commands and aliases, or by taking advantage of CS2’s new 200ms error margin window. The manual method is more forgiving than in CS:GO – simply throw your grenade within 200ms of reaching the peak of your jump and CS2 will treat it as a perfect throw. For bind setup, enable the console, create a jumpthrow alias, and bind it to your preferred key.
Why are my jumpthrow binds not working in CS2?
Your jumpthrow binds may not work due to several reasons: the console isn’t enabled, there’s a typo in your alias commands, the key you’re trying to bind has a conflict, or you’re using pre-August 2023 bind syntax. Try using scancode binding with quotes around the key letter, explicitly rebind your spacebar if it stopped working, and verify your autoexec file is actually loading. The CS2 engine changes mean some keys that worked in CS:GO may need different syntax now.
What happened to jumpthrow binds in CS2?
In August 2023, Valve disabled traditional alias-based jumpthrow binds as part of their response to the Snap Tap automation controversy. The CS2 engine no longer supports chaining commands the same way CS:GO did. However, Valve replaced this system with a 200ms error margin window that makes manual jumpthrows much more consistent. Players can still use binds with workarounds like scancode-specific bindings, but the new system is designed to be more accessible while preventing automation.
Can you get banned for using jumpthrow bind in CS2?
No, you cannot get banned for using jump throw binds in CS2. Unlike Snap Tap and other automation features that Valve explicitly banned, jumpthrow binds using legitimate console commands and aliases are allowed. Valve’s anti-cheat does not flag players for using jumpthrow binds because they’re considered part of normal game configuration, not cheating or automation. Many professional players and competitive matches continue to use jumpthrow binds without issue.
Conclusion
Mastering CS2 jump throw bind essential binds is about understanding both the technical setup and the game changes that affect how they work. Whether you choose to use traditional binds with scancode workarounds or embrace the new 200ms error margin system, consistent grenade throws are crucial for competitive play in 2026. Practice the console setup methods, experiment with autoexec configuration, and spend time in deathmatch perfecting your timing.
The most important thing is finding what works for you. Some players prefer the reliability of binds, while others have adapted to the more forgiving manual throws enabled by CS2’s engine updates. Either way, understanding how CS2 jump throw bind systems work after the August 2023 changes will make you a more valuable teammate and improve your utility usage across all maps.