Mastering CS2 map callouts is one of the fastest ways to climb ranks in Counter-Strike 2 competitive play. When you know the right names for every location, your team communication becomes instant and precise. This CS2 map callouts printable reference guide covers every Active Duty map with clear, easy-to-memorize location names.
I’ve spent countless hours in matchmaking watching teams lose rounds simply because someone yelled “they’re over there” instead of giving a proper callout. The difference between “enemy at long doors” and “enemy somewhere on that side” can determine whether your team rotates in time or gets caught off guard.
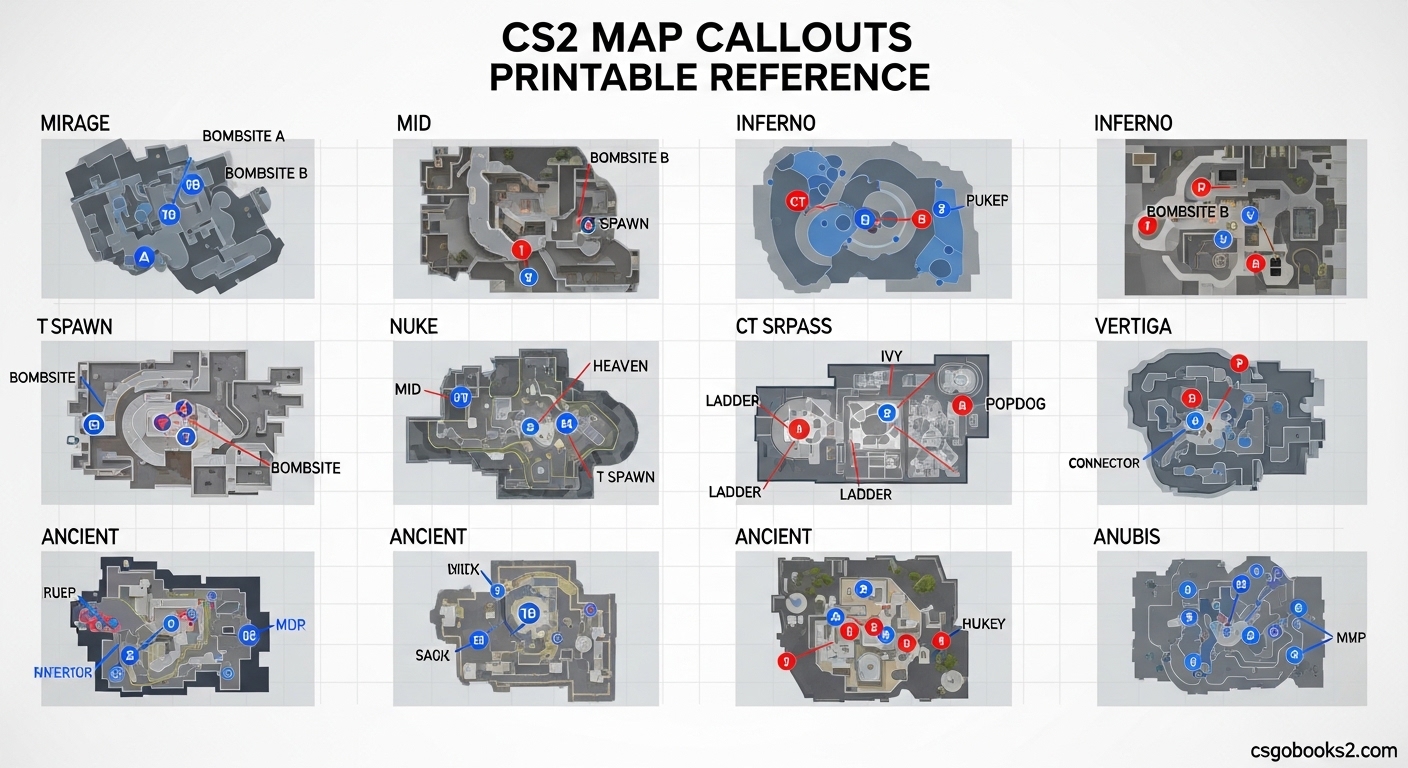
This guide is designed as a CS2 map callouts printable reference you can use during practice sessions or keep open on a second monitor. Every major location on every competitive map is covered with the standard names used by most players.
What Are CS2 Map Callouts?
CS2 map callouts are specific names that players use for different locations on Counter-Strike 2 maps. These standardized names allow teams to communicate enemy positions, rotation requests, and strategic information quickly and accurately.
Instead of saying “there’s a guy near that brown box thing past the doorway,” you simply say “enemy at long.” Your teammates instantly know exactly where to look or rotate.
Callouts originated from the CS community over decades of competitive play. Some names come from visual landmarks (like “banana” on Inferno), others from removed map props (like “x-box” on Dust 2), and some simply describe the location (like “heaven” for elevated positions).
CS2 Map Callouts Printable Reference (April 2026)
This section is designed as your quick-reference guide. Each map has its callouts organized by bombsite and area. You can print this entire guide or keep it bookmarked for instant access during matches.
CS2 Map Callouts Quick Reference
Before diving into individual maps, here’s a quick overview of the Active Duty map pool and their callout complexity:
Dust 2 – 45+ callouts (Beginner friendly)
Mirage – 50+ callouts (Intermediate)
Inferno – 40+ callouts (Intermediate)
Nuke – 55+ callouts (Advanced – vertical complexity)
Overpass – 50+ callouts (Advanced)
Ancient – 35+ callouts (Beginner friendly)
Anubis – 40+ callouts (Intermediate)
Vertigo – 45+ callouts (Advanced – unique vertical design)
Dust 2 Callouts
Dust 2 is the most iconic map in Counter-Strike and the perfect starting point for learning callouts. Its straightforward layout makes it beginner-friendly while still offering strategic depth.
Bombsite A Callouts
Long A – The long pathway approaching A site from T spawn
Long Doors – The doors entering A site from long
Pit – The depressed area in front of A boxes
CT Spawn – The CT spawn area near A site
Short – The short pathway connecting mid to A site
Catwalk – The raised path approaching A from short
A Ramp – The ramp leading up to A site from CT side
Tetris – The stacked boxes near A site plant spot
Bombsite B Callouts
B Tunnels – The underground passages connecting T spawn to B
Upper Tunnels – The elevated section near B site entrance
Lower Tunnels – The lower section with crates
B Doors – The doors entering B site from mid
Car – The car near B site entrance
Back Platform – The raised area at back of B site
B Window – The window overlooking B from mid
Mid Callouts
Mid Doors – The central doors connecting mid to both sites
X-Box – The box formation in mid (named after removed prop)
Mid – The central courtyard area
CT Mid – The CT-controlled area near mid doors
Mirage Callouts
Mirage is one of the most tactically complex maps in the Active Duty pool. Its interconnected layout requires strong communication and map control.
Bombsite A Callouts
A Ramp – The main ramp approaching A site from CT side
Stairs – The stairs connecting ramp to A site
Jungle – The narrow pathway connecting apartments to A site
Palace – The building overlooking A site from CT side
Window – The window room overlooking A site entrance
A Site – The open bombsite area
Firebox – The area near the firebomb crate
Bombsite B Callouts
B Apartments – The apartment complex connecting to B site
Van – The van outside apartments (named after removed prop)
Underpass – The underground path to B site
Market – The market area connecting mid to B
B Site – The bombsite area itself
Default – The default plant location on B
Back of B – The area behind bombsite boxes
Mid Callouts
Connector – The hallway connecting mid to both sites
Window Room – The room overlooking connector
Top Mid – The elevated CT position in mid
Bottom Mid – The lower T-controlled area
Ladder Room – The room with ladder to heaven
Heaven – The elevated position overlooking mid from CT side
Inferno Callouts
Inferno features tight choke points and explosive gameplay. Mastering its callouts is essential for executing and defending sites effectively.
Bombsite A Callouts
Long – The long pathway approaching A site
Long Hall – The hall connecting long to A site
Pit – The depressed area in front of A site
CT Spawn – The spawn area connected to A site
Library – The room connected to A site entrance
Arch – The archway entrance to A site from mid
Deli – The storefront area near long
A Site – The bombsite area itself
Bombsite B Callouts
Banana – The curved pathway from mid to B site
Car – The car at the banana bend (named after removed prop)
CT Spawn – The spawn area near B site
Boiler – The room near CT spawn on B side
B Site – The bombsite area
Default – The standard plant location on B
Back of B – The area behind bombsite boxes
Kitchen – The room connected to boiler
Mid Callouts
Top Mid – The CT-controlled area near mid
Middle – The central courtyard area
Arch Side – The CT side of arch
Middle Door – The door connecting mid to long
Nuke Callouts
Nuke’s vertical design makes it one of the most challenging maps for callouts. Multiple levels and overlapping areas require precise communication.
Bombsite A Callouts (Upper)
Heaven – The elevated CT position overlooking outside
Hell – The lower area under heaven
Secret – The hidden path to A site
Rafters – The high position above A site
A Site – The upper bombsite area
Mini – The mini-garden area outside
Headshot Box – The box providing headshot cover at A
Bombsite B Callouts (Lower)
Outside – The exterior area of B site
Garage – The garage area outside B
Warehouse – The warehouse connecting to outside
B Site – The lower bombsite area
Vents – The vent system connecting areas
Back of B – The area behind bombsite boxes
Default – The standard plant location on B
Mid/Lower Callouts
Ramp – The ramp connecting lower to upper levels
Lobby – The central area connecting multiple paths
Squeaky – The squeaky door near lower bombsite
Lower – The lower level of the map
Upper – The upper level of the map
Trophy – The trophy area near ramp
Overpass Callouts
Overpass features unique vertical gameplay and water areas. Its callouts can be confusing due to the multi-level design.
Bombsite A Callouts
Long – The long pathway to A site
Short – The short path to A site from mid
A Site – The bombsite area itself
Construction – The construction area near A
Pillar – The pillar providing cover on A
Heaven – The elevated CT position near A
Tarp – The covered area near construction
Bombsite B Callouts
Fountain – The fountain area in mid
Park – The park area leading to B site
B Site – The bombsite area
Toilet – The small room near B site
Sandwich – The sandwich shop near B
Default – The standard plant location on B
Back of B – The area behind bombsite boxes
Farm – The farm area near park
Mid/Water Callouts
Water – The water area running through mid
Connector – The connection between mid and sites
Monster – The monster statue area (named after removed prop)
Mid – The central courtyard area
Barrels – The barrel area near water
Stairs – The stairs connecting different levels
Ancient Callouts
Ancient is one of the newer maps in CS2 with a unique Aztec theme. Its callouts are relatively straightforward compared to older maps.
Bombsite A Callouts
A Main – The main entrance to A site
A Site – The bombsite area
Donut – The donut-shaped structure on A
Waterfall – The waterfall area near A
Temple – The temple area near A site
Heaven – The elevated position overlooking A
Mid – The mid area connecting to A
Tunnel – The tunnel leading to A site
Bombsite B Callouts
B Main – The main approach to B site
B Site – The bombsite area
Outside – The exterior area of B site
Tunnel – The tunnel connecting to B
Stairs – The stairs approaching B site
Default – The standard plant location on B
Back of B – The area behind bombsite boxes
Pool – The pool area near B site
Mid Callouts
Mid – The central courtyard area
Middle Door – The door connecting mid areas
Top Mid – The elevated position in mid
Lower Mid – The lower area of mid
Side – The side path connecting mid to sites
Anubis Callouts
Anubis is an Egyptian-themed map with wide angles and open spaces. Its callouts are still evolving as the map matures in the competitive scene.
Bombsite A Callouts
A Long – The long pathway to A site
A Site – The bombsite area
Water – The water area on A side
Elephant – The elephant statue area
Pillars – The pillar area on A site
Heaven – The elevated position overlooking A
Default – The standard plant location on A
Tunnel – The tunnel connecting to A site
Bombsite B Callouts
B Main – The main approach to B site
B Site – The bombsite area
Balls – The balls area near B site (named after spherical props)
Market – The market area near B
Sniper – The sniper nest overlooking B
Default – The standard plant location on B
Back of B – The area behind bombsite boxes
Bridge – The bridge area near B site
Mid Callouts
Mid – The central courtyard area
Top Mid – The elevated CT position in mid
Lower Mid – The lower T-controlled area
Connector – The connection between mid and sites
Side – The side path to bombsites
Vertigo Callouts
Vertigo takes place on a skyscraper under construction, making its callouts unique due to the vertical design and lack of traditional map boundaries.
Bombsite A Callouts
A Ramp – The main ramp approaching A site
A Site – The bombsite area
Heaven – The elevated position overlooking A
Default – The standard plant location on A
Ladder – The ladder area near A site
Scaffolding – The construction area on A
Back of A – The area behind bombsite boxes
Edge – The edge area near A site
Bombsite B Callouts
B Ramp – The ramp approaching B site
B Site – The bombsite area
Kitchen – The kitchen area near B
Default – The standard plant location on B
Back of B – The area behind bombsite boxes
CT Spawn – The spawn area near B
Middle – The mid area connecting to B
Tunnel – The tunnel leading to B site
How to Memorize CS2 Map Callouts Faster?
Learning every callout on every map takes time, but I’ve developed methods that speed up the process significantly. Here’s how I teach new players to master callouts in weeks instead of months.
Start with One Map at a Time
Don’t try to learn every map simultaneously. Pick Dust 2 first since it’s the most straightforward and commonly played. Spend at least 3-5 days focusing only on that map’s callouts before moving to Mirage or Inferno.
I recommend this learning order based on map complexity and play frequency: Dust 2, Mirage, Inferno, Ancient, Anubis, Overpass, Nuke, Vertigo.
Use Deathmatch for Active Practice
Deathmatch servers are perfect for practicing callouts without competitive pressure. Every time you get a kill or die, say the callout out loud. “Got one at long,” “Died at banana,” “Enemy mid.”
This verbal reinforcement connects the location names to actual gameplay. After a few deathmatch sessions, the callouts become automatic.
Watch Pro Matches with Callout Tracking
Professional CS2 matches are excellent for learning standard callouts. Watch matches with the sound on and pay attention to team communication. Pros use the most standardized callouts that you’ll encounter in matchmaking.
Pause the stream when rounds end and look at where players are positioned. Match their locations to the callouts you hear from their team comms.
Create Your Own Callout Maps
Open each map in a private server and walk around naming every location. Take screenshots and label them with callout names. Create your own annotated maps for reference.
Many players find that physically labeling maps helps memorization more than just reading lists. The act of connecting visual locations to names strengthens the memory association.
Practice with Teammates
If you have regular teammates, make callout practice part of your routine. Before ranked sessions, spend 10 minutes in a private server calling out locations while your teammates verify the names.
This collaborative approach catches mistakes early and ensures your whole team uses the same callout system. Nothing is worse than learning one set of names while your team uses another.
Common Mistakes to Avoid
After years of playing and teaching CS2, I see the same callout mistakes repeated by players at all skill levels. Avoiding these pitfalls will accelerate your learning and improve team communication.
Using Old or Removed Prop Names
Some callouts reference props that were removed from maps years ago. The “x-box” on Dust 2 no longer has an Xbox-shaped prop, but the name persists. The “van” on Mirage was removed long ago, yet players still use the callout.
Learn which callouts are historical versus descriptive. This helps when playing with newer players who may not know the legacy names.
Making Up Your Own Callouts
While some creativity in callouts is fine, using completely non-standard names confuses teammates. If you call “that brown box area” instead of “pit,” your team won’t know where you mean.
Stick to established callouts until you’re experienced enough to know when introducing a new name makes sense. Even then, explain it to your team beforehand.
Confusing Similar Map Locations
Many maps have locations with similar names. On Mirage, there’s both “window” overlooking A site and “window room” in mid. On Nuke, there are multiple “heaven” and “hell” positions.
Be specific with your callouts to avoid confusion. “Heaven on A” versus “heaven on B” clarifies which elevated position you mean.
Silent Gameplay
The biggest mistake is simply not using callouts at all. Even imperfect callouts are better than silence. If you’re unsure of the exact name, describe what you see: “Two enemies pushing that long path with doors.”
Your teammates can often figure out what you mean from context, and they might provide the correct callout name. Communication is always better than silence.
Pro Player Communication Tips
Professional players elevate callouts beyond simple location names. Their communication systems include additional information that makes callouts more actionable for teammates.
Include Damage Information
Don’t just say “enemy long.” Say “enemy long, 80 damage.” This information helps your teammates know how much health the opponent has, which affects engagement decisions.
This added context turns a basic callout into actionable intelligence for your team.
Specify Numbers and Weapons
“Two A-ramps with AKs” is more useful than “enemy A-ramp.” The number of opponents and their weapons helps your team assess the threat level and respond appropriately.
A single enemy with a pistol requires a different response than multiple enemies with rifles.
Use Time-Based Callouts
“Enemy long, just rotated” is more valuable than “enemy long.” The timing information tells your team the enemy’s recent movement, which predicts where they might be going next.
Time-stamped callouts help track enemy rotations throughout the round.
Confirm or Deny Information
When a teammate gives a callout, respond with confirmation or correction. “Copy that, I see them too” or “Negative, that’s cleared” keeps everyone on the same page.
This feedback loop prevents confusion and ensures the team has accurate information.
Printable Reference Tips
This CS2 map callouts guide is designed to be your comprehensive reference for competitive play. Here’s how to get the most value from it as a printable resource.
Print-Friendly Formatting
Each map section is structured for easy printing. You can print the entire guide or select specific maps you’re currently learning. The text-based format ensures readability on any device.
Consider printing each map section on a separate page for quick reference during practice sessions.
Offline Study Strategy
Review callouts when you’re not in-game. Read through each map’s callouts during breaks or before playing. This offline reinforcement strengthens memory without the pressure of active gameplay.
Many players find that reviewing callouts before sleep helps with memorization. The brain processes this information during rest, making it more accessible during matches.
Quick Reference During Matches
Keep this guide open on a second monitor during casual matches or practice sessions. Refer to it when unsure of a callout name. Over time, you’ll need to reference it less frequently as the names become automatic.
Don’t be afraid to pause during warm-up or practice to look up callouts. Building the correct associations is worth the brief interruption.
CS2 Map Callouts FAQ
What are callouts in CS2?
CS2 map callouts are specific names players use for different locations on Counter-Strike 2 maps. These standardized names enable teams to communicate enemy positions, rotation requests, and strategic information quickly and accurately during competitive matches.
How do I learn CS2 map callouts?
Start with one map at a time, beginning with Dust 2. Use deathmatch servers to practice saying callouts out loud during gameplay. Watch pro matches to hear standard callouts used by top players. Create annotated maps with callout names. Practice with teammates who can correct your mistakes. Focus on 3-5 days per map before moving to the next one.
Are CS2 callouts the same as CS:GO?
Most CS2 map callouts remain the same as CS:GO since the maps are largely unchanged. However, some maps received visual updates that changed landmarks. Callouts based on removed props like ‘van’ on Mirage or ‘x-box’ on Dust 2 persist as historical names even though the props are gone.
What is the hardest map for callouts?
Nuke is considered the hardest map for callouts due to its vertical design with multiple overlapping levels. The various ‘heaven’ and ‘hell’ positions, combined with the complex ramp system, make precise communication challenging. Overpass and Vertigo also present difficulties due to their unique vertical gameplay and multi-level layouts.
Why do some callouts have multiple names?
Some callouts have multiple names because they developed independently in different regions or communities. Professional players might use different names than casual matchmaking players. Other callouts reference removed props but persist as legacy names. The best approach is learning the most common names and adapting to what your teammates use.
Conclusion: Master Your CS2 Map Callouts
Learning CS2 map callouts transforms your gameplay from confused individual play to coordinated team success. This printable reference guide gives you everything needed to master every Active Duty map location.
Start with Dust 2, practice consistently in deathmatch, and don’t be afraid to reference this guide during matches. Within a few weeks, you’ll notice callouts becoming automatic and your team communication improving dramatically.
Keep this CS2 map callouts printable reference bookmarked for quick access during practice sessions. The difference between good and great CS2 players often comes down to communication – and that starts with knowing exactly where every enemy is located.